Photobashing 101 – My First Cyberpunk Cityscape
“Neon alleys, endless rain, and six months of trial & error.”
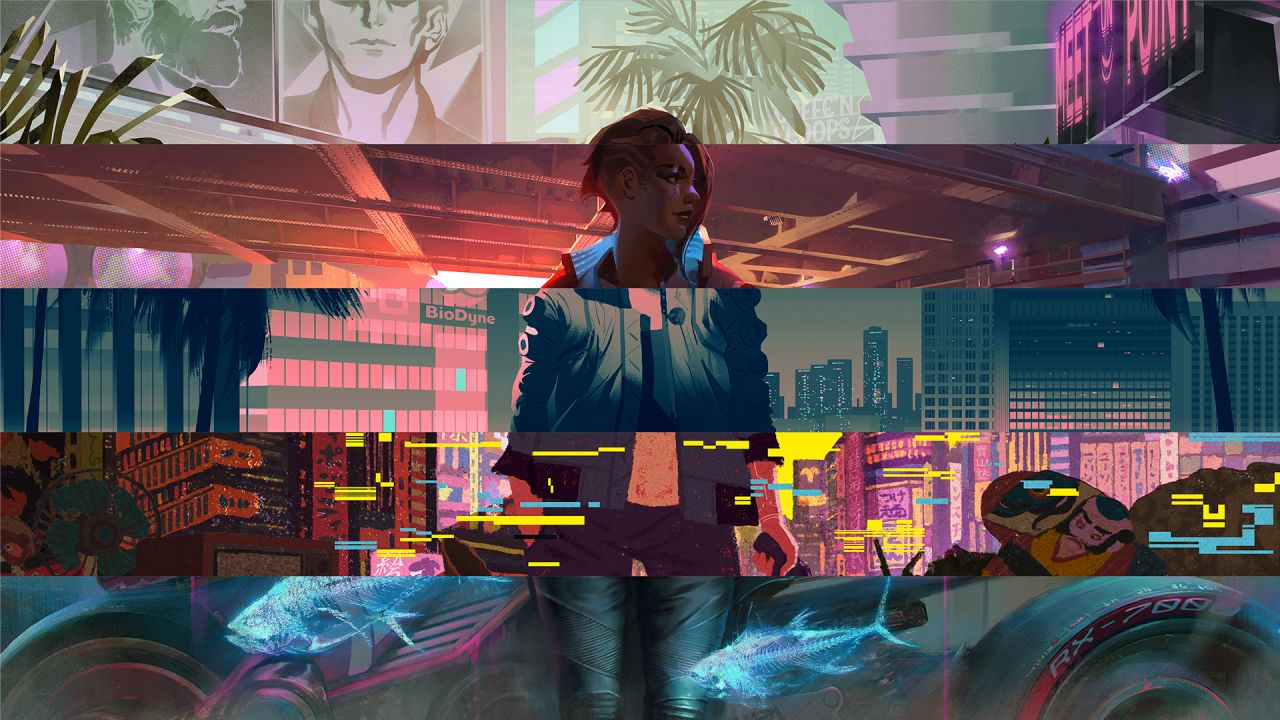
Welcome to my first official photobash tutorial. After six months of late-night experimenting, kitbashing photos, and studying neon-lit films like Blade Runner, I finally finished my very first cyberpunk cityscape illustration. Here’s the full breakdown of how I went from empty canvas to neon skyline.
What is Photobashing? (30-second explainer)
Photobashing is a digital art technique where you combine photographic elements with painting. Think of it like collage—but with Photoshop layers, blend modes, and digital paint on top to create a seamless final image. Game studios use it to build concept art fast, and indie creators (like me) use it to give life to worlds that would take forever to paint from scratch.

My Learning Path: 6 Months of Nightly Practice
When I first discovered photobashing, it felt intimidating. How do you blend dozens of images into a single believable world? My process looked something like this:
- Month 1–2: Practiced masking, cutting out buildings, and learning perspective matching.
- Month 3: Built small alleyway scenes using free stock photos.
- Month 4: Focused on lighting—matching shadows, adding highlights.
- Month 5: Studied color grading from cyberpunk films.
- Month 6: Composed my first full-scale cityscape.
“The key lesson: it’s not about perfection. It’s about hiding the seams and letting atmosphere do the heavy lifting.”
Asset List: Free Stock + DSLR Alleys
Half the fun of photobashing is hunting down raw materials. My main sources included:
- Pexels / Unsplash: free building facades, rainy roads, and neon lights.
- My DSLR shots: I wandered my city at night snapping alleys, dumpsters, and fire escapes—perfect cyberpunk ingredients.
- Textures.com: concrete, rust, and rain overlays.

Layer Stack Tour (GIF)
One of the best ways to learn is to peek inside someone’s PSD. I exported a quick layer stack GIF so you can see how the cityscape builds up:
- Background sky gradient + mist
- Base city blocks
- Foreground neon signs
- Rain overlay
- Final color grade

Color-Grading Trick: Teal & Sodium Vapor
The cyberpunk look hinges on one thing: color grading. My favorite combo is teal shadows and orange-yellow highlights (sodium vapor). It creates instant neon drama and mimics the way city lights actually bounce around in rain and fog.
“Split-toning teal and sodium vapor is the one-click recipe for cyberpunk vibes.”
Free PSD Download (Non-Commercial)
Want to dig through my messy Photoshop file and see how it’s built?
Download PSD (for learning only)Reader Challenge: Show Me Your Own Cyberpunk Chops
Tutorials are only half the story—the real growth comes when you try it yourself. That’s why I’m starting a little challenge:
🚀 Cyberpunk Challenge
Build your own neon alley or cityscape using free stock photos + your own shots. Post it on social media with the hashtag #MyFirstPhotobash and tag me—I’ll feature my favorites in a future post!
Final Thoughts
Learning photobashing was like discovering a cheat code for concept art. Instead of spending weeks painting every window and pipe, I could focus on atmosphere, lighting, and storytelling. Photobashing 101 – My First Cyberpunk Cityscape is just the start—I can’t wait to see what you’ll build with your own assets and imagination.